Ever browsed a store, fallen in love with something, and left without buying—only to have that very item haunt you around the internet? That’s not sorcery. That’s retargeting, and it works surprisingly well.
In e-commerce, a “no” isn’t always the end. It’s often just a “not yet.” Retargeting helps you reconnect with those almost-customers. It gives them a gentle reminder of what they showed interest in, and often, that’s all they need to come back and complete the purchase.
It’s not just about showing the same ad again and again. Smart retargeting uses the right message at the right time. It’s about being personal, timely, and just persuasive enough to make someone reconsider.
Let’s walk through how you can set up retargeting in e-commerce from the very beginning to get real results.
Retargeting in E-Commerce
Retargeting in e-commerce is where you really get to reconnect with people who’ve shown interest in your store—but haven’t yet become customers.
That might be someone who browsed through your products, added items to their cart or just checked out your homepage. Whatever the reason they didn’t complete the action you were hoping for—that action being a purchase, of course—retargeting helps bring those visitors back.
It does that by showing them personalized ads as they browse other websites, apps or social media. You could think of it as a friendly reminder of what they left behind. That’s what makes retargeting such a powerful tool for growing your online store—and turning lookers into buyers.
Steps to Set Up Your Retargeting Ads for E-commerce Success
Step 1: Create and Define Audiences
Setting up your audiences is where you define your target visitors who have interacted with your site but haven’t converted yet.
It means you are about to target the right people at the right time.
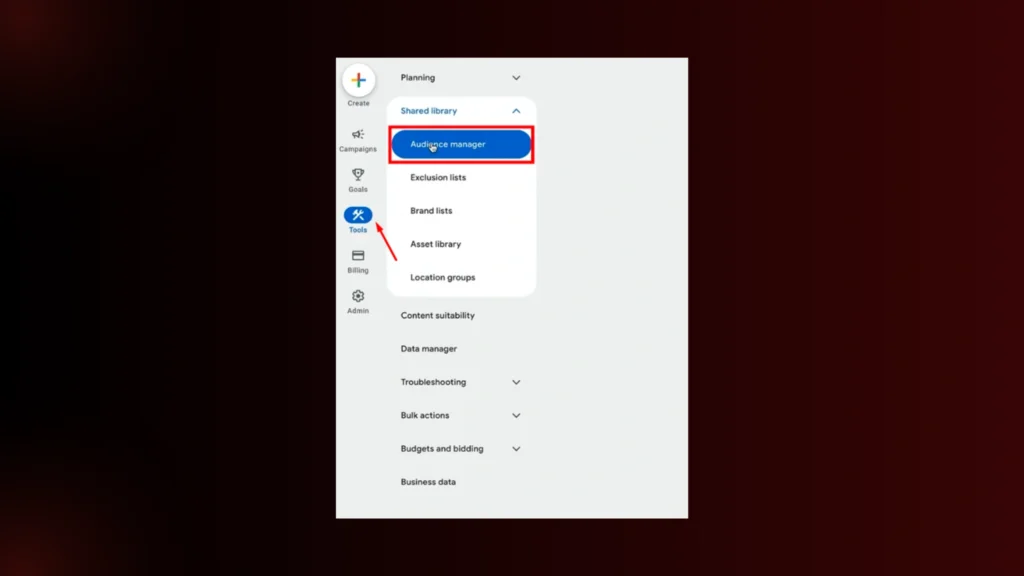
- In your Google Ads account, head to the “Tools” menu and click on Audience Manager under the “Shared Library” section.
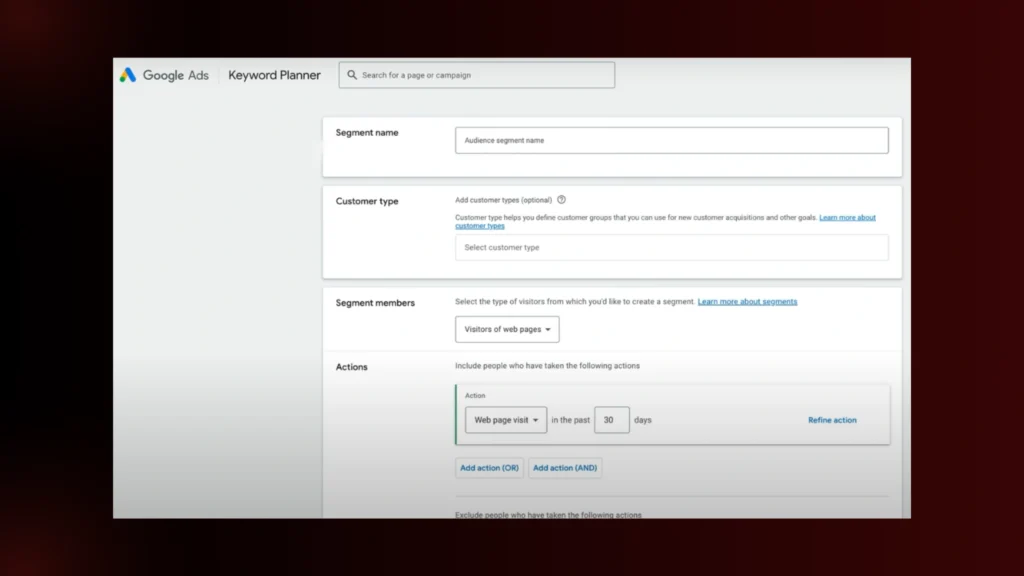
- Create your audiences from scratch rather than using pre-populated ones like “cart abandoners” or “homepage viewers.”
You can do that by manually creating new audiences to ensure accuracy.
- Segment your audience based on the URL—for example, create a segment for cart abandoners by specifying the audience based on the checkout page URLs.
- You’ll want to set a time frame for your audience—a 30-90 day window usually works best, depending on customer behavior.
Step 2: Create Your Retargeting Campaign
Now that you have your audiences set up, it’s time to move on to the campaign creation stage. To do that:
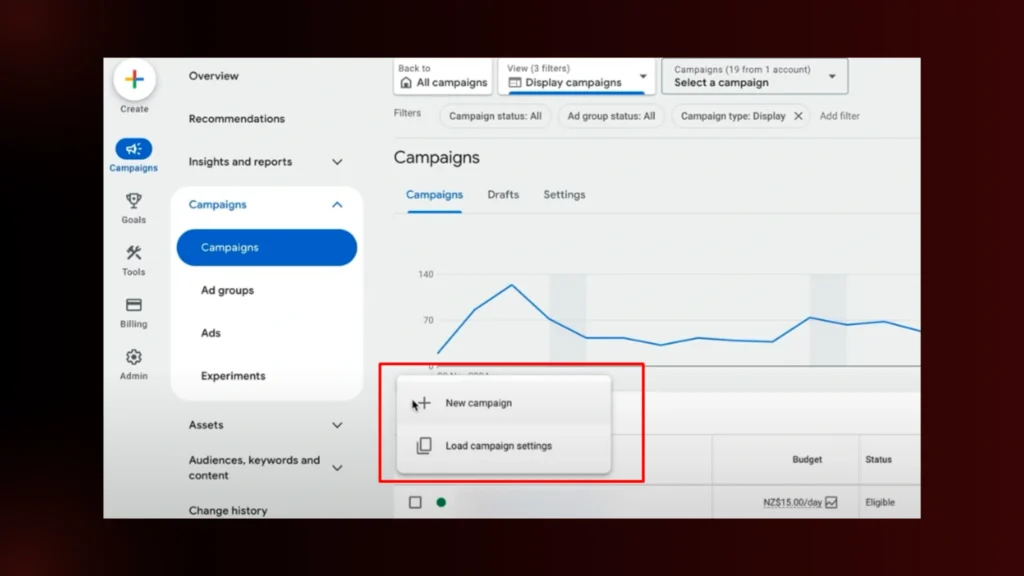
- Start a new sales campaign.
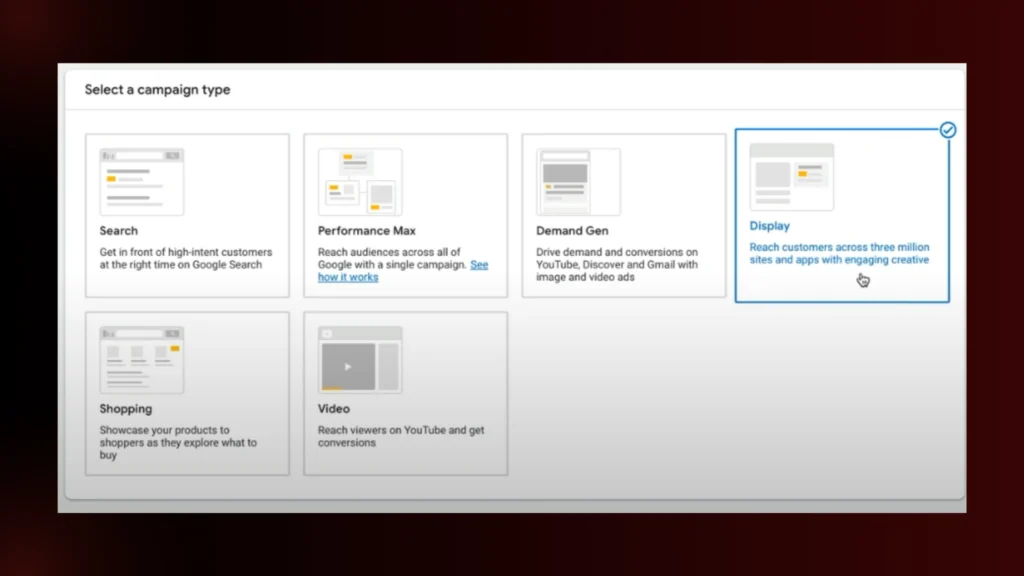
- Choose the Display Campaign type and name the campaign. Next, set the location and language setting.
- Under More Settings, go to Dynamic Ads to fill out the information.
To make dynamic retargeting ads work, link your Google Merchant Center to your Google Ads account. That way, you can pull in product details and show visitors the exact products they interacted with on your site.
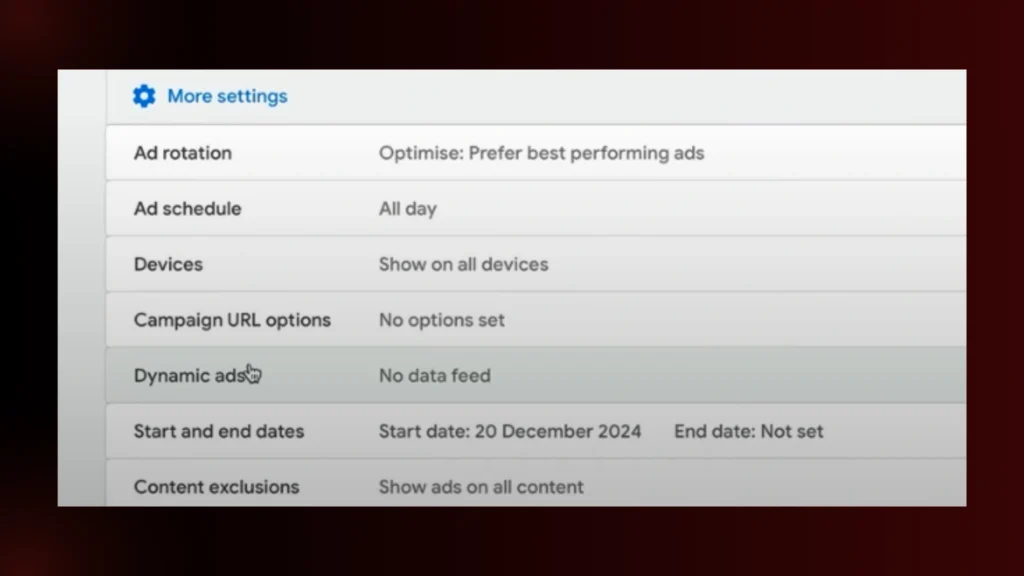
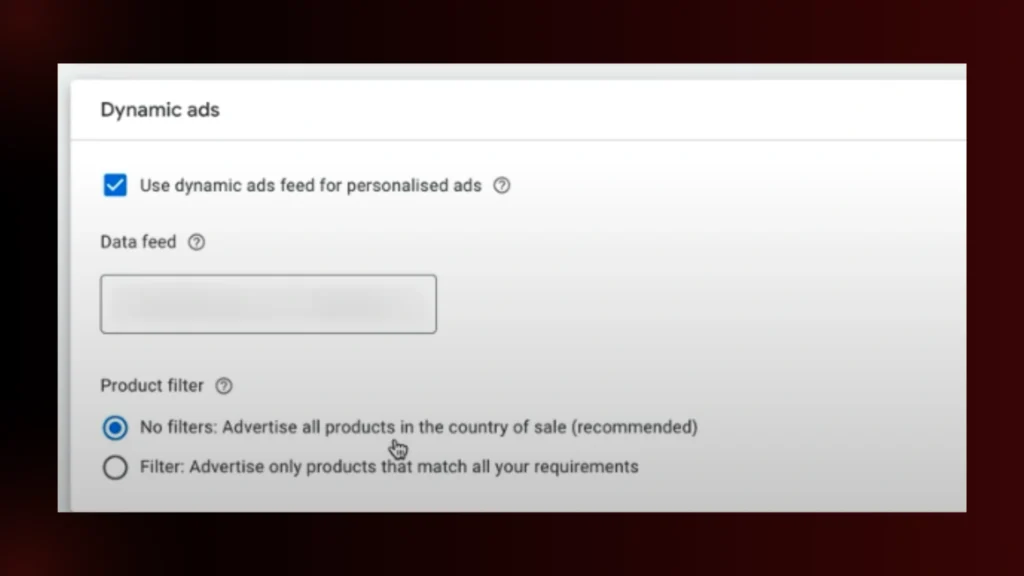
- Check the Box: Tick the checkbox that says “Use dynamic ads feed for personalized ads.”
- Select Product Feed: Choose the correct product feed from the dropdown list. This should be connected through your Google Merchant Center.
- Do Not Add Filters: Select the No Filters option to allow all products in the feed to be eligible to be shown in the ads.
Step 3: Set Your Budget and Bidding Strategy
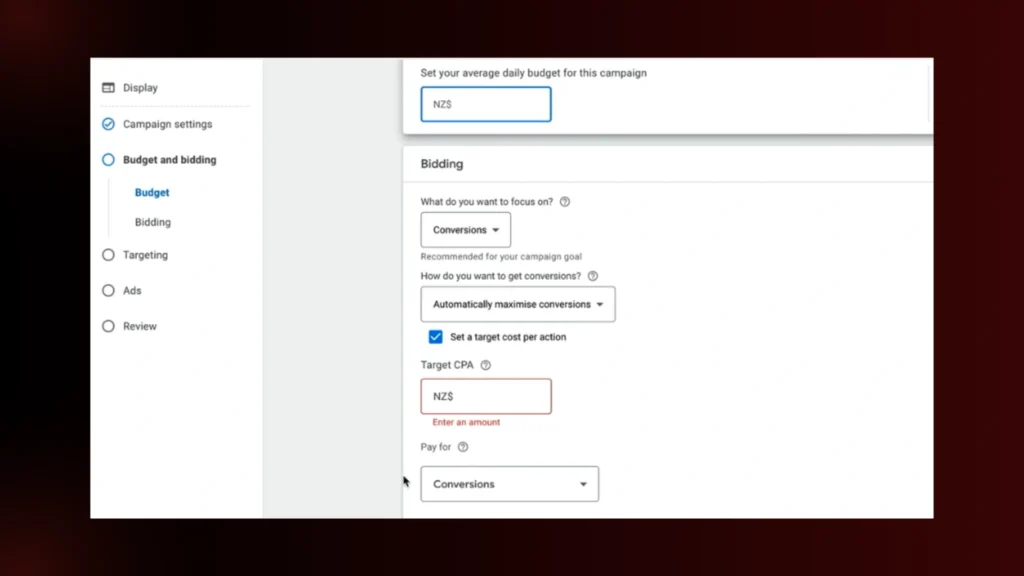
Before you launch your campaign, decide on your budget and bidding strategy. Start with a small budget. You can begin with $25-50 a day to test performance. You can even start with $10 a day for a very small website.
Choose a bidding strategy that maximizes conversions. You might want to start with Maximized Conversion Value without initially setting a target ROAS (Return on Ad Spend) and adjust it later based on the results.
Step 4: Audience Targeting Setup
You’ll need to link the audiences you created to your campaign. Select the audience you’ve created under the “Audience Segments” section; select “cart abandoners,” for example.
Set up one ad group for your initial audience, then duplicate and modify it for other audiences like Product Page Viewers or Homepage Viewers.
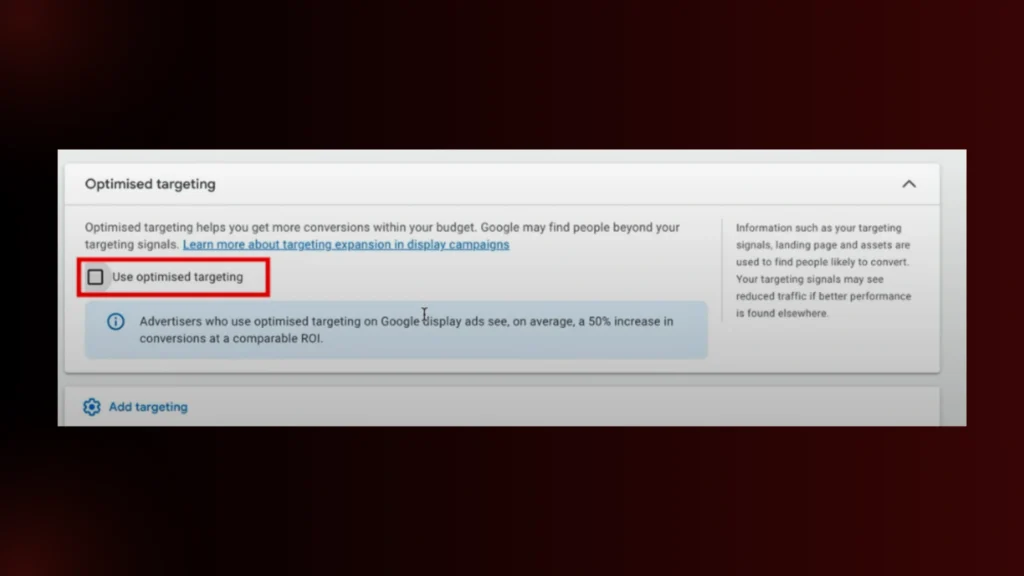
Step 5: Turn Off Optimized Targeting
One setting you’ll want to turn off in Google Ads is “optimized targeting.” That’s because it tries to find new audiences outside of your defined segment, and that’s not ideal for retargeting. You want to make sure you’re only retargeting the people who have interacted with your site.
Step 6: Create Your Ads
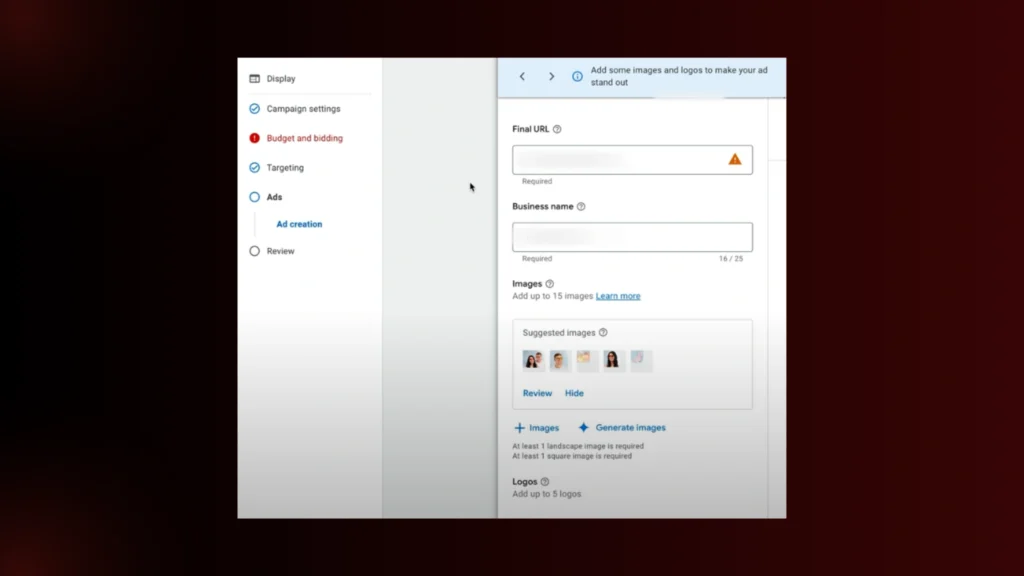
Finally, it’s time to create your ad content.
- Enter the URL for the landing page, which is usually your product page.
- Upload Images & Videos: Add up to 15 images and 5 logos. If you have videos, you can upload them as well. These will be used in your dynamic ads.
- Headlines and Descriptions: Enter up to 5 headlines and relevant descriptions that Google will dynamically use when displaying the ads.
Step 7: Review and Launch
Once you’ve finished all the steps above, review your campaign settings, make sure everything looks good, and launch your campaign.
Also Read
- The Ultimate Guide to Google Ads for Financial Advisors
- How to Run Facebook Ads for Financial Advisors: 7 Steps
Pro Strategies to Maximize Retargeting Performance
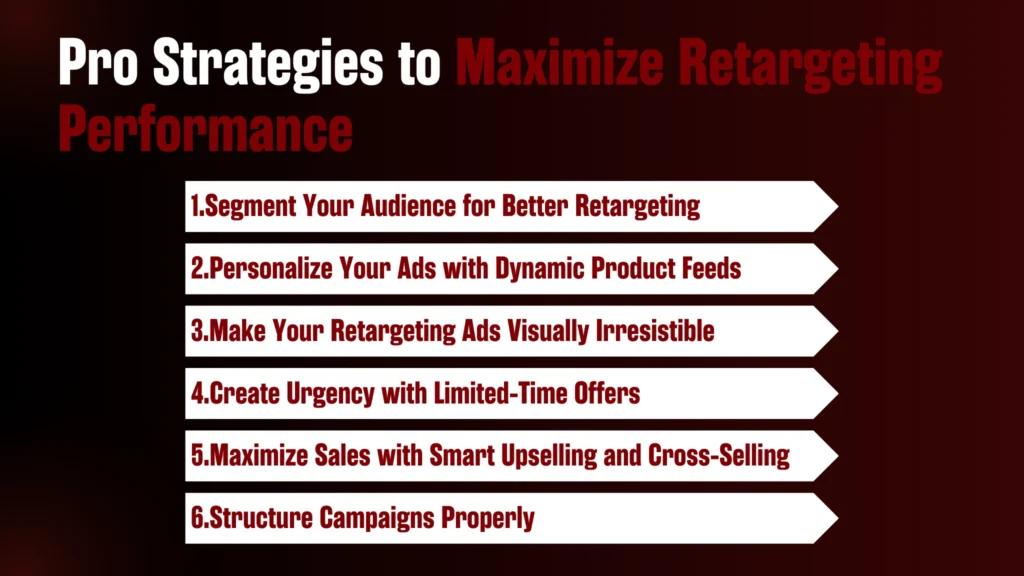
1. Segment Your Audience for Better Retargeting
To improve your retargeting performance, it’s essential to segment your audience based on their website activity and intent.
Different types of visitors require different approaches:
Product Viewers: These visitors have medium to high intent.
- Retarget within 30–60 days
- Perform well with dynamic product ads
Category Page Viewers: They browsed categories but not individual products.
- Medium intent
- Use a retargeting window of around 30 days
Cart Abandoners: High intent and usually deliver the best return on ad spend.
- Smallest audience segment
- Target for 60–90 days; up to 540 days for high-ticket items
Homepage Visitors: A broad audience with low intent.
- Use 14–30 days for general engagement
- If bounce rates are high, shorten to 3–7 days
Previous Purchasers: Perfect for upselling and cross-selling.
- Use a window of 30–90 days based on your repurchase data
- Show complementary or upgraded products.
2. Personalize Your Ads with Dynamic Product Feeds
Dynamic ads boost performance by automatically pulling in real-time product data like name, image, and price from your Google Merchant Center feed.
- These ads feel more relevant and personalized.
- Tend to outperform static creatives.
Most performance and ad spending typically come from dynamic content.
3. Make Your Retargeting Ads Visually Irresistible
Strong visuals and clear copy are key to better results. Use clean, high-resolution images where the product takes up most of the frame. Keep your text concise and benefit-focused.
- Headlines should emphasize value.
- Descriptions should be short and appealing.
- Test various combinations of visuals and text.
4. Create Urgency with Limited-Time Offers
Urgency is powerful in retargeting. It helps push hesitant users to take action quickly, especially those who have abandoned carts or viewed specific products.
- Use phrases like “Only 24 hours left” or “Limited stock available.”
- Countdown timers can also create urgency.
- Works well for driving quick conversions
5. Maximize Sales with Smart Upselling and Cross-Selling
After someone makes a purchase, don’t stop marketing. Use custom feeds to show related or upgraded products.
6. Structure Campaigns Properly
A clean campaign structure allows better control and results. Avoid mixing prospecting and retargeting in one campaign. Create separate ad groups for each audience.
Bonus Tips
Customize your message for each audience to increase engagement.
- Cart Abandoners → Add urgency and offers
- Homepage Viewers → Emphasize brand benefits and trust factors
Ensure your audience size is large enough to allow creative testing and personalization
Final Words
Retargeting is one of the easiest ways to win back lost customers and increase sales—if done right. By showing the right message to the right people at the right time, you can turn “just looking” into “just bought.”
Simple tweaks like segmenting your audience, using dynamic ads, and creating urgency can make a big difference.
Brand ClickX can build and manage high-performing retargeting campaigns for your store—so you don’t leave sales on the table.
Book your free strategy call with us today and start turning clicks into customers!
Read Blog Posts:
- The Ultimate Guide to Building a High-Converting Facebook Ads Funnel
- What Is a Pixel in Facebook Ads? A Complete 2025 Guide
- Facebook Ads vs TikTok Ads: Which One Fits Your Brand Better?
FAQs
1. Who is retargeting for?
Retargeting is for businesses reaching out to people who’ve shown interest but didn’t take action.
2. Which are the two main types of targeting?
The two types are demographic (age, gender, location) and behavioural (based on online actions).
3. Why is retargeting good?
It’s good because it reminds potential customers about your brand, boosting the chances of a sale.
4. Is retargeting inbound or outbound?
Retargeting is outbound because it reaches out to people who’ve already shown interest.


